Tutorial Details
- Program: Adobe Photoshop CS4
- Difficulty: Beginner
- Estimated Completion Time: 3 Hours
Resources: The main stock image used on this tutorial is available here.
Step 1
Lets create a new document with 4000x3163px dimension and fill the first layer with black. Create a folder named BG and open a picture of some skyscrapers in a new layer fitting it proportionally to the width of the document. Next move up whole layer like it is depicted in the picture below.
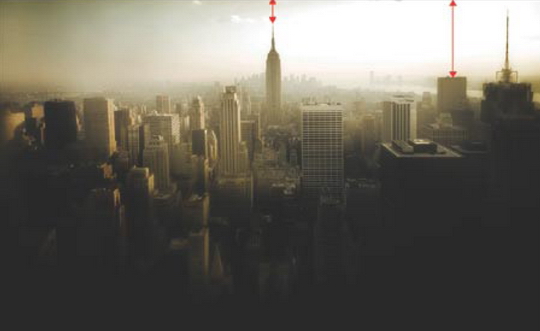
Now we take care of making the sky in right and left corner uniform. Thus, using the rectangular marquee tool we select a 1500x750px area in a top left corner we copy [Ctrl]+[C] and paste it [Ctrl]+[V] into a new layer, flipping it horizontally (Edit>Transform>Flip Horizontal). Next we move this layer to the top right corner, change the blending mode (Darken) and mask out the redundant parts.
Step 2
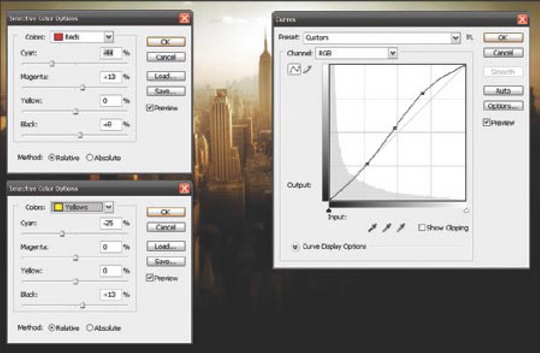
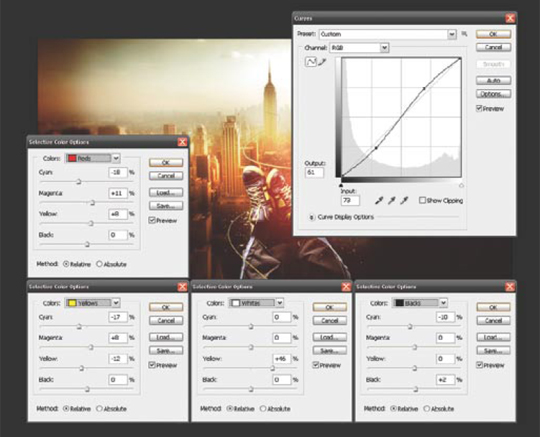
Using (Selective Color) and (Curves) we choose the appropriate colors for the city.
Step 3
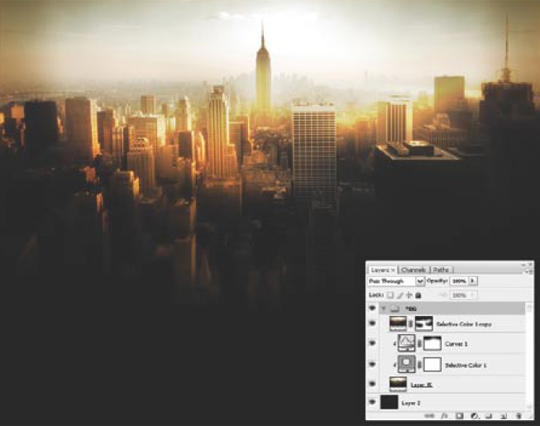
Create new layer by choosing (Image>Apply image) and click OK. Use filter (Filter>Blur>Radial blur) with the following settings: Amount: 100, Blur method: Zoom, Quality: Best. Change the layer blending mode to (Color Dodge) and set the opacity to 75%. Mask edges of the layer in a way, that the light is focused in the central part of the city.
Step 4
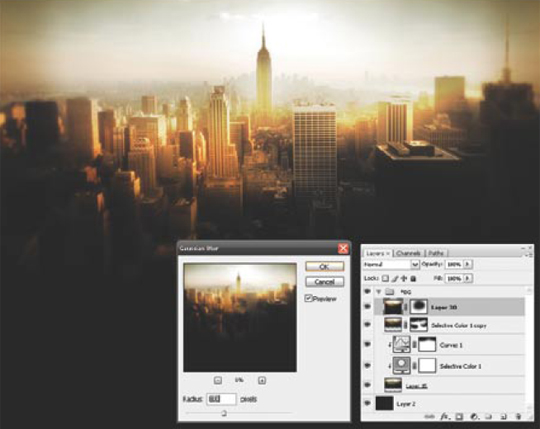
Create another new layer choosing (Image>Apply image). Blend a whole (Filter>Blur>Gaussian blur) Radius: 8px, masking this time a central part of the layer. This way, we obtain a depth of field.
Step 5
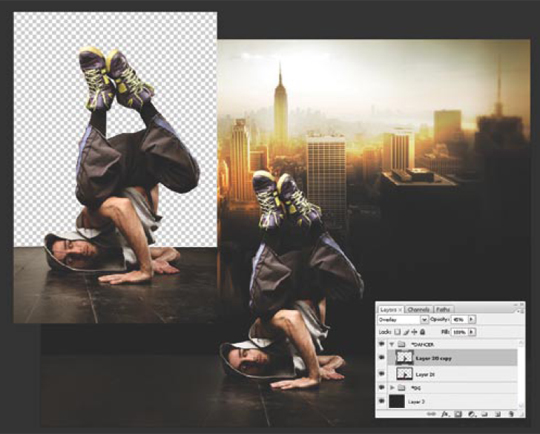
Add new folder named Dancer. Open a picture and cut everything except the floor and a dancer. Below the layer with dancer we place a floor (floor.png), which I have prepared by copying parts of the original picture with (Clone stamp) tool. Now we mask the layer with a dancer (Layer>Layer mask>Reveal all) with a soft brush: Master diameter 300px, Hardness 12px, Opacity 55% in a way to make the layers match each other. Next we select both layers and merge them together [Ctrl]+[E]. Then we duplicate the layer [Ctrl]+[J], change its mode to (Overlay) and opacity to 45%.
Step 6
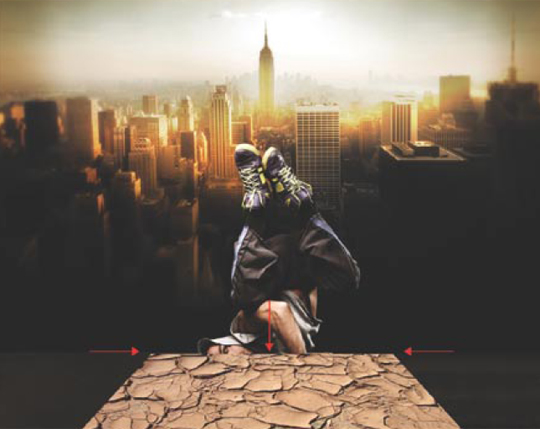
Now load a texture.png fle and scale it to 42% of a whole picture size. Then we push [Ctrl]+[T] and adjust the height of the texture to the height of the floor. Having the transformation active [Ctrl]+[T], we choose (Edit>Transform>Perspective) and having a (Shift) key pushed, we move one of the top corners of the picture to the center.
Step 7
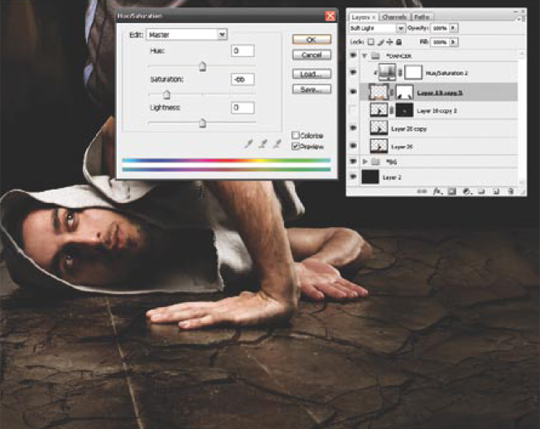
Mask the texture edges with a soft brush and remove it parts in a place where the dancers’ hands and a head appear. Set the blending mode to (Soft light) and change a texture color with (Image>Adjustment>Hue/Saturation).
Step 8
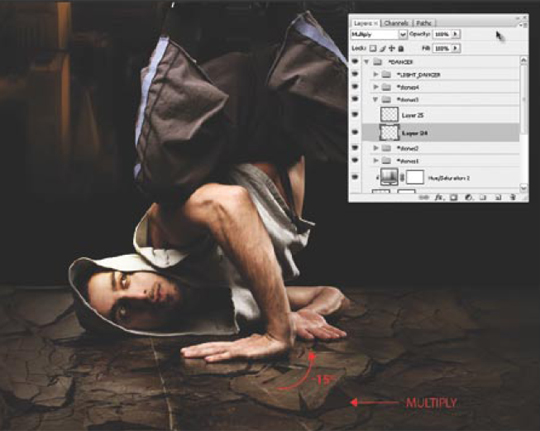
Create a new folder Stones in a Dancer folder. We cut the part with a broken floor out of the layer and move it into a Stones folder. We duplicate it, and set the blending mode of the stone in the underlying layer to (Multiply). Now we return to the stone in the above layer and rotate it about -15% and move it to achieve the look that it is falling off. Repeat this step for all the stones, remembering about setting the appropriate degrees of tilt for stones placed in the upper layers.
Step 9
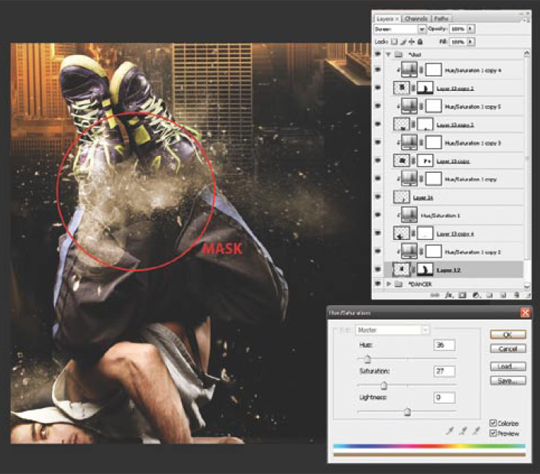
Create another folder named Dust. In this step we will focus on masking and appropriate placement of elements. Lets open dust1.jpg, reduce its size and change the blending mode to (Screen). We move the layer into a suitable place and mask it this way to make the dust appear above the dancer. Next, using (Image>Adjustments >Hue/ Saturation) we give it a color matching the rest of illustration. Repeat this work using also the second picture dust2.jpg. To obtain a better result it is worth to differentiate a dust masking in a such way, so it would appear in front of a dancer.
Step 10
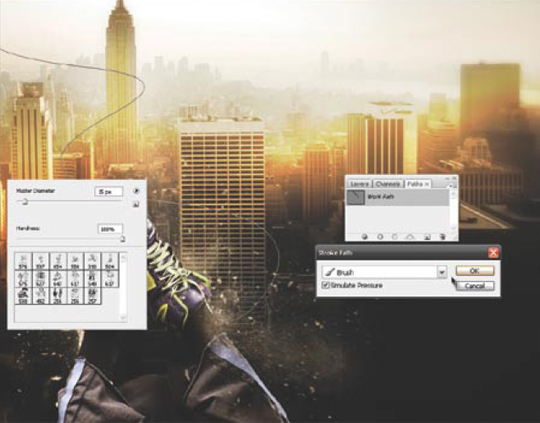
Create a new layer in a folder. Using a (Pen tool) set to (Path) we draw a path on which the lace will stretch. We change the brush parameters: Master diameter 15px, Hardness 100%, Opacity: 100%, Flow: 100% and go to the (Path) tab. Click the layer containing a path with right button and select (Stroke path). In a new window select (Simulate pressure) and click OK.
Step 11
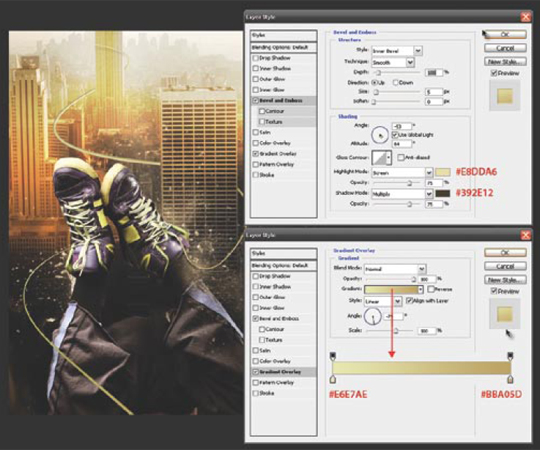
Now we go to the layer properties and set (Bevel and Emboss) and (Gradient overlay). In the same way we create another shoelace. We add layers’ masks and using a brush we hide the shoelaces in parts where they should appear behind buildings and dancer.
Step 12
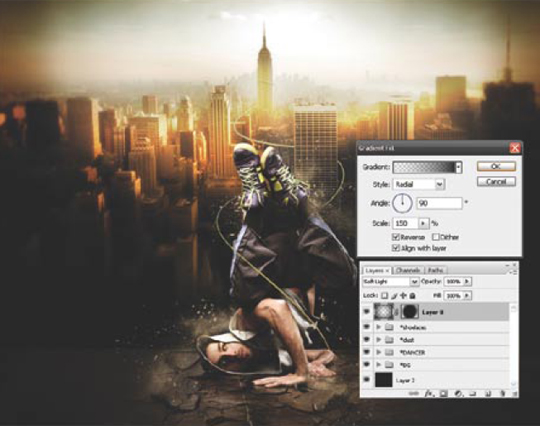
Restore default color settings [D] and choose (Layer>New fll layer>Gradient). Pick the following settings: Style: Radial, Scale: 150% and set the (Reverse) option. Now fatter the layer (Layer>Rasterize>Layer) and change its blending mode to (Soft light). In case, when the illustration became too dark, you should mask a its central part with a soft brush or just change the opacity.
Step 13
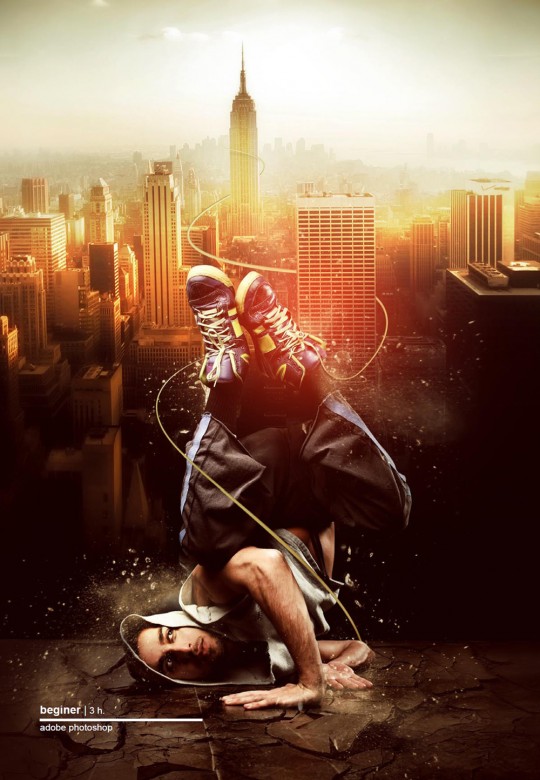
At the end, the only thing we are left to do, is to create a folder SET containing the setting for a whole illustration. We do this using (Curves) and (Selective color). Additively, on a new layer having blending mode set to (Screen), we create a light effect using brush with #d73015 color and following settings: Master diameter: 1600px, Hardness: 0px, Opacity: 100%, Flow: 100%.



.jpg)


